
这是一个创建于 1700 天前的主题,其中的信息可能已经有所发展或是发生改变。
刷油管时显示器亮度是 50%,写码时为护眼调到 5%,手动切换麻烦,搞个全自动方案
前端油猴检测全屏状态,调用后端服务器接口,服务器响应后,执行本地程序调整显示器亮度
以下为伪代码,仅为展示大概流程:
检测全屏状态
const listener = {
	blur (){
		if(document.fullscreenElement)
			screen.brightness = 'dark';
	},
	focus (){
		if(document.fullscreenElement)
			screen.brightness = 'light';
	},
	fullscreenchange (){
		screen.brightness = document.fullscreenElement ? 'light' : 'dark';
	},
};

for( const type in listener )
{
	addEventListener( type , () => {
		if( document.querySelector('video') )
			listener[type]();
	} );
}
screen 上还没有我们需要的 brightness 属性,那么定义一个
let _brightness = 'dark';
Object.defineProperty( screen ,'brightness', {
	get: () => _brightness ,
	set: mode => {
		_brightness = mode ;
		fetch(`https://server:1234/brightness/${ mode }`, {
			mode:	'cors',
			cache:	'no-cache',
		} );
	},
} );
前端完成了,来搭个简易服务器,这里用新玩具 Deno
import { listenAndServeTLS } from './std/http/mod.ts';

const tlsOpts = {
	hostname:	'server',
	port:		1234 ,
	certFile:	'./server.crt',
	keyFile:	'./server.key',
};

listenAndServeTLS( tlsOpts , async req => {
	[ , req.router , req.source ] = req.url.split('/');

	const serve = ({
		brightness	,
	})[req.router];

	const res = ( await serve(req) ) || responseText('OK');

	if(!res.headers)
		res.headers = new Headers();
	res.headers.set('Access-Control-Allow-Origin','*');
	req.respond(res);
} );

async function brightness(req)
{
	const callee = brightness ;
	callee.slope = callee.slope || 128 ;

	const lut = (...args) => {
		return Deno.run({
			cmd: [
				'./lib/lut.exe', ...args
			],
			stdin:	'piped',
			stdout:	'piped',
		});
	};

	({
		light: async () => {
			const { value } = await waitOutput( lut('g','a') );
			const [ level ] = /\d+(?=\s+$)/.exec( decodeText(value) );
			const slope = Math.round( level / 255 );
			callee.slope = slope ;
			lut('c');
		},
		dark: () => lut('c', callee.slope ),
	})[req.source]();
}
Windows 提供系统函数 SetDeviceGammaRamp,调用显卡支持的 Gamma 斜率映射,来调整系统亮度。这个系统亮度并不是显示器的真正亮度,我们称之为软亮度
https://docs.microsoft.com/en-us/windows/win32/api/wingdi/nf-wingdi-setdevicegammaramp
系统小工具大师 nirsoft 给出的示例代码
https://www.nirsoft.net/vc/change_screen_brightness.html
有人给出了 C 封装的命令行程序,也就是上面的 lut.exe
https://gist.github.com/FloooD/e653137600967759cfea
装个轻量级 Dev-Cpp,编译一下可以用
平时手动调整系统软亮度可以用 nirsoft 出品的 Volumouse,这样自动和手动微调结合就完美了
https://www.nirsoft.net/utils/volumouse.html
另一个不能错过的好软件是直接调整显示器硬件亮度的 ClickMonitorDDC,细节设置非常丰富,也支持命令行参数。我不用这个是因为显示器在亮度为 0 时仍然太亮,这时软亮度才能胜任
检验一下效果
https://i.ibb.co/fxtGCWd/We-Chat-20210223205725.gif
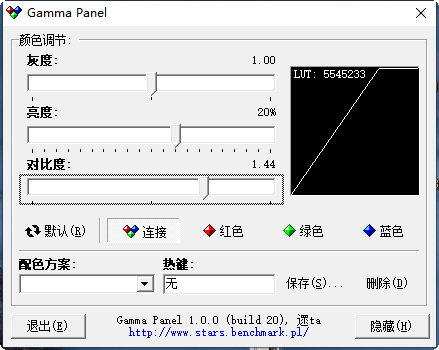
前端开发者可能想到,CSS 的 filter 属性有 brightness 方法,这个方法可以直接用到视频上。不过,请看这个 Gamma 映射曲线
https://i.loli.net/2021/02/23/no8DwdYvrAkTuCI.png
在最高亮度不变的情况下,增大 Gamma 斜率会损失亮部细节,导致削峰失真。所以 Gamma 斜率压缩是无损的,增大则不行。上面的 lut.exe 和 Volumouse 是同样道理,只用到了其中的无损区间
1 条回复 • 2021-02-25 20:24:18 +08:00
 |
1
codefredzeng 2021-02-25 20:24:18 +08:00
有点意思
|